Posts in Sweets
Peanut Butter & Chocolate Chip Chia Cookies
Photography by Elisa Watson.

Photography by Elisa Watson.

It is the first day of Spring here in Australia and I couldn't be happier! The tulips are out in my garden, the blossoms are starting to appear in the streets, the sun has been out and the weather is slowly warming up. I am sorry to my friends where you have just experienced last day of summer for the year and are heading into Autumn - although Autumn rules, as do the leaves, the sweaters and the food so I wouldn't be too sad! 

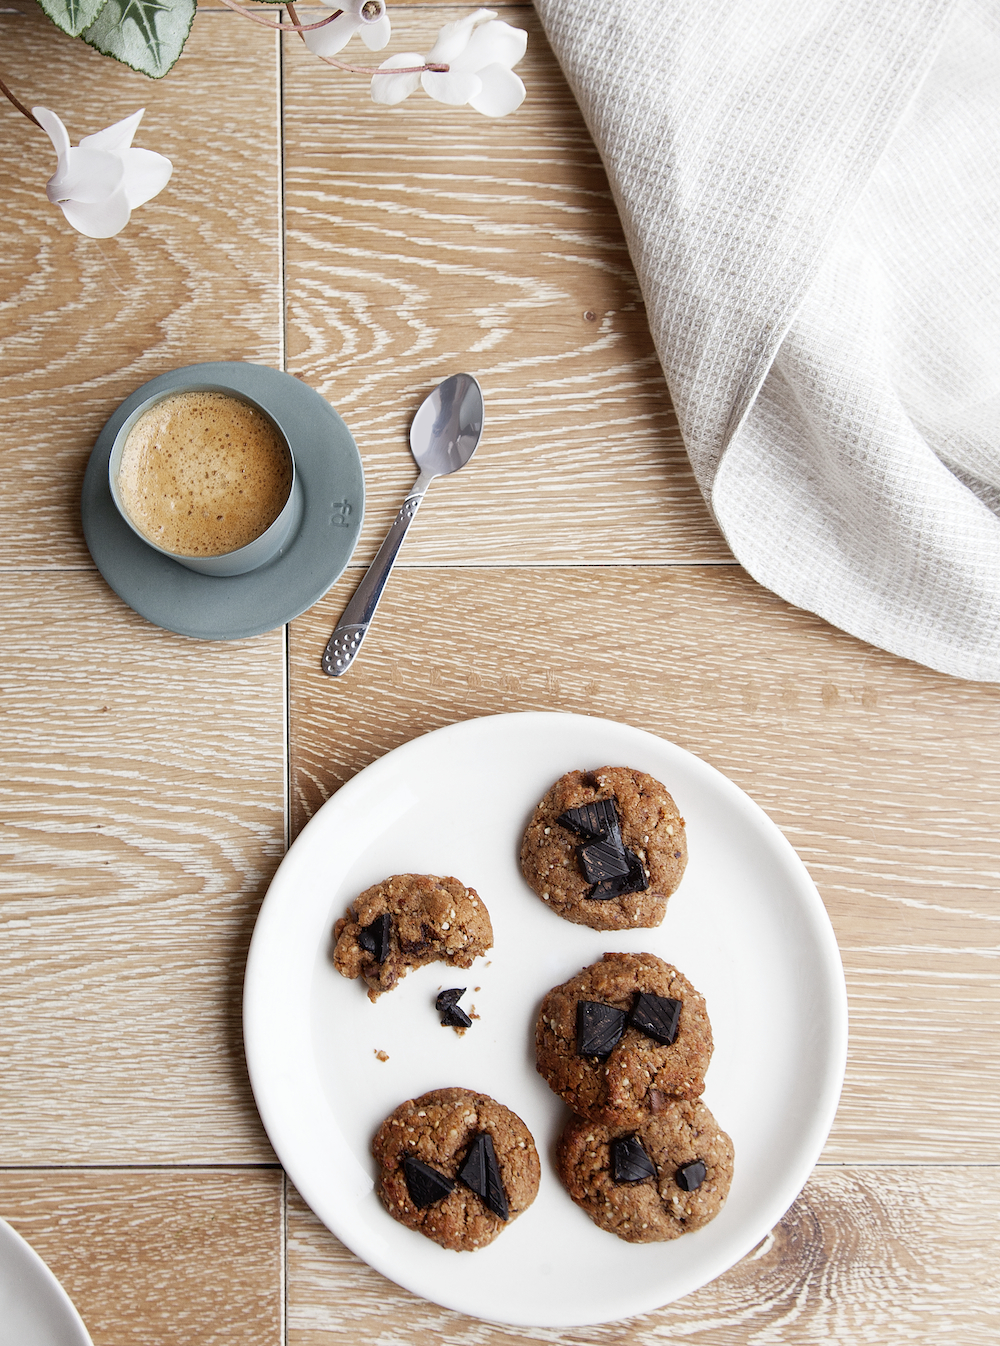
Today I present you a biscuit which in my opinion is the best thing in any season and at any time of the year. They are very easy to whip up, they are the most delicious and will have you totally in love as they melt in your mouth. These little beauties are perfect for the lunch box or enjoyed with a cup of coffee or tea (or dare I say it a glass of creamy nut mylk!). They are super crunchy on the outside and soft in the middle - something quite rare and hard to achieve when making plant based cookies! 

Not only are these bad boys vegan, but they are also refined sugar free and gluten free. So what are you waiting for? Do yourself (and your family, friends and colleagues) a favour and get a batch of these in the oven!


Makes around 40 cookies
Prep time: 5 minutes
Cooking time: 20 minutes

Ingredients
1 1/2 cups buckwheat flour*
1 cup brown rice flour
1 cup almond or hazelnut meal
3/4 cup coconut sugar
1 1/2 tsp baking powder
1/2 tsp salt
1/4 cup chia seeds
1/3 cup coconut oil
2/3 cup plant based milk (such as soy, oat, almond)
1/3 cup peanut butter or almond butter
2 tsp vanilla paste
1/2 cup dark choc pieces

Method
Preheat oven to 180ºC/350ºF.

In a stand alone mixer (or just a bowl if you do not own one) add the flours, almond/hazelnut meal, coconut sugar, baking powder, salt and chia seeds. Mix the ingredients together until combined.

Add in the coconut oil, plant based milk, peanut butter and vanilla paste. Mix for 2-3 minutes or until a dough has formed. Add in the dark chocolate pieces and mix for a further minute.

Roll out 1 heaped tsp of dough at a time and place onto a lined baking tray - leaving a small gap between cookies. Bake in the oven for 15 minutes (or until cookies are golden), rotating your tray half way through. You may have to do the cookies on two trays as it makes a lot!

Remove from the oven and allow to cool - even if you want to sneak a cookie whilst they are warm, please let them sit for 5 minutes to ensure they have crisped up before you do!

Once completely cooled store in an air tight container for up to 5 days, that is if there is still some left!
 

The Ultimate Vanilla Coconut Sundae
Photography by Elisa Watson.

Photography by Elisa Watson.

I hope you have all enjoyed your weekend and are feeling as good as you can on a Monday! Are you ready to kick this weeks butt and do something you're proud of? I hope so! For now I present to you a little treat to take those Monday blues away. It is a recipe for one of my all time favourite desserts, which is just as delicious as it looks. 

The recipe is for a sundae, and this sundae is THE ultimate, and I am not just saying that because it is my recipe - I'm saying it because it actually is! This sundae is an absolute dream in your mouth and will have all your taste buds screaming for more. Beginning with a smooth and creamy vanilla ice cream which is then made complete with a beautiful berry compote sauce and some insanely moorish caramelised maple nuts. You could serve this up to anyone and completely win over their heart. Not only does it look and taste beautiful, but it also can be made from start to finish within half an hour! 

This recipe is completely dairy, refined sugar and gluten free. It is a heavenly vegan treat and it's practically the healthiest thing you'll ever eat. Right?? Maybe not, but it is packed with good fats and is a perfect alternative to your regular (quite harmful) dairy and sugar laden sundae!

Make sure you stay tuned to the website this week as I will be launching the information and tickets to my first ever cooking classes which will be held in Melbourne this coming October!

Now without further ado, please enjoy this decadent dessert, and I'm sure it is something that you will create it again... and again... and again...


Serves 4

Vanilla Coconut Ice Cream

Ingredients
800 ml coconut cream* 
125 ml (1/2 cup) rice malt syrup
1 tbsp maple syrup
2 tsps vanilla paste or 2 vanilla beans (scraped)
pinch salt

Method
Place all ingredients into a blender and blitz until smooth. 

Transfer the mixture into an ice cream maker and churn for 15 minutes or until frozen.

Remove from ice cream maker into a container and set aside in the freezer. You can make this in advance, just be sure to remove the ice cream from the freezer 5-10 minutes before serving to make for an easy scoop!

Berry Compote Sauce

Ingredients
2 cups frozen berries
2 tbsp xylitol or stevia
1 tsp vanilla essence
1/2 tbsp rice malt syrup or raw honey

Method
Place the berries, sweeteners and vanilla into a small saucepan. Leave on a low heat for 10 minutes stirring occasionally. Once thickened, remove from heat and set aside.

Maple Roasted Nuts

Ingredients
1 cup raw mixed nuts (I use 1/2 cup cashews 1/2 cup macadamias)
2 tbsp maple syrup
1/4 tsp cinnamon
1/2 tbsp coconut sugar
good pinch salt (don't skimp on this!)

Method
Preheat your oven to 180°C (356°F) and line a baking tray with grease proof paper.

Place your nuts onto the tray and sprinkle over the maple syrup and cinnamon. Using a spoon mix the nuts until coated in the maple syrup. Spread evenly over the paper and then sprinkle over the coconut sugar and a good pinch of salt.

Place tray into the oven to cook for 5-10 minutes or until golden, turning once half way through. Be sure to keep an eye on your nuts so as they do not burn as some ovens may be hotter than others!

Assembling of the Sundae

To assemble the sundae simply place some berry compote at the bottom of four small glasses. Place in a scoop or two of the ice cream, another small drizzle of the berry sauce and top with the roasted nuts. Enjoy!

Jamaican Ginger Cake
Photography by Elisa Watson, styling by Kate Bradley for Nourish Magazine September/October 2014 Issue.

Photography by Elisa Watson, styling by Kate Bradley for Nourish Magazine September/October 2014 Issue.

And so here it is, the second country to be picked for my around the world recipe features! The next 2 months I will be showcasing some of my favourite Jamaican recipes which will have you reaching for the coconuts and pineapples pretending you're on a beach! Jamaican food is quite hard to come by in Australia and I know it's not a cuisine enough of us are familiar with or have been exposed to. So I thought it was time to end that and bring forward the tastes of the Caribbean for all to enjoy.

This cake is one of my all time favourite cakes. It really is. It has such an amazing texture and flavour that it's hard to stop at just one piece! It's a great cake to share with friends and enjoy with a cuppa. The ginger taste is present but not overpowering so it can still be enjoyed by fussy children (as well as fussy adults).

Please enjoy the first instalment of the Jamaican recipes which will be brought to you every Friday for the next 2 months. x


Serves 8-10
Cooking time: 30 minutes
Prep time: 15 minutes

Ingredients

1 cup coconut sugar
1 cup vegan spread (like omega spread or nuttelex)
4 eggs
2 1/2 cups white spelt flour
2” knob ginger, grated
1 tsp vanilla paste
1 cup soy/plant based milk
1/4 tsp salt
2 tsp cinnamon
5 tsp ground ginger
4 tsp baking powder


Method

Preheat oven to 180 degrees Celsius. Grease a bundt tin and set aside.

In a stand alone mixer, cream together the butter and coconut sugar for 2 minutes on a medium speed. Add in one egg at a time and beat for a further 2 minutes.

Gradually add in the flour and milk intermittently. Beat for a further 2 minutes.

Pour into a greased bunds tim and place into the oven for 30-40 minutes or until a skewer comes out clean. 

Let cake cool in tim for 10 minutes and remove and serve.

Korean Sweet Potato Glutinous Rice Donuts
Photography by Elisa Watson, styling by Kate Bradley (Kenko Kitchen) for Nourish Magazine July/August 2014.

Photography by Elisa Watson, styling by Kate Bradley (Kenko Kitchen) for Nourish Magazine July/August 2014.

Greetings from Turkey everyone! I am currently in Cappadocia about to head south and am having the time of my life. I cannot wait to share photos and the food with you as long as the beauty of this country! Expect a lot to come, but for now you can follow me on Instagram to see my movements! 


This is week I have got for you a continuation of my Korean feature and I hope you enjoy!! These are such a delicious little treat and are a great unexpected use of sweet potato!


 Serves 6-8

Ingredients
For the donuts
400g sweet potato
1 3/4 cups glutinous brown rice flour
1/2 cup spelt flour
1/3 cup coconut sugar
1/2 tsp salt
1/2 tsp baking powder
1 cup hot milk*

+ rice bran oil for frying

For rolling in
1/2 cup white coconut sugar
2 tsp cinnamon

Method
Begin by steaming the sweet potatoes whole. Scrape the flesh from the skin and place into a bowl with the brown rice flour, spelt flour, coconut sugar, salt and baking powder. Discard the skins. Add in the milk a little at a time until a nice dough has formed. *Note you may not need all the milk depending on your dough.

Heat some rice bran or vegetable oil in a saucepan. We want the oil to be extremely hot. To test a piece carefully drop in a small amount of dough into the oil. If it bubbles straight away, the oil is hot enough, if not, leave to heat up for longer.

Roll the dough into small balls and carefully drop in a few at a time into the oil.

Cook the doughnuts until very golden on each side. Be careful not to remove to early or they will still be dough like inside. The longer you leave them in, the more “donut” like they will be. Normally around 3-5 minutes. Flipping them over halfway in between.

Once donuts have been removed roll them in a bowl with the coconut sugar and cinnamon and serve.

Amazing Apple Crumble with Vanilla Coconut Custard
IMG_1066.jpg

When winter hits there is something very, very comforting about stewed fruits and warm desserts. Apple crumble with custard is one of the desserts that ticks all the winter comfort food boxes. However the butter, calorie content and high refined sugar found in the standard version of this dessert will often lead to the winter kgs being stacked on. I decided to create my own vegan, refined sugar and butter free version to avoid this from happening - to fill my own winter comfort food cravings, and to also cater for my families love of puddings.
 
If I said that this crumble and custard wasn't very good I would be flat out lying. Just try it for yourself and see what you think. I can almost guarantee you won't go back to the original after this. 

Some of the crumble topping ingredients: puffed quinoa, rapadura sugar, flaked almonds, pepitas and buckwheat. 

Some of the crumble topping ingredients: puffed quinoa, rapadura sugar, flaked almonds, pepitas and buckwheat. 

Ingredients
 
For the filling
2kgs organic apples (preferably green and peeled, but you can leave the skin on)*
10 medjool dates
1 tsp stevia
juice 1 orange
1 tbsp coconut oil
 
For the topping
2 tbsp desiccated coconut
1 tbsp coconut flour
handful rolled oats/rolled spelt
1/4 cup flaked almonds
1/3 cup puffed quinoa
1/3 cup pepitas (preferably activated)
1/4 cup caramelised buckinis (or plain activated buckwheat)
2 tbsp rapadura or coconut sugar
1/4 cup coconut oil

For the custard
 
 1 400ml tin coconut cream
1 tbsp stevia
1/4 cup water
3 egg yolks (or 3 tsp corn flour or egg replacer for vegans)
2 tbsp corn flour
1/2 tsp vanilla powder (or 1 tsp vanilla extract)
optional - 1 tbsp mesquite or lucuma powder for an extra bit of flavour
 

First thing we want to do is make the stewed apples for the crumble. Chop apples up into thick slices or dice depending on how you normally like it. Take out the pits from your medjool dates and chop them into rough 1/4s. Place your chopped apples into a saucepan along with the orange juice, stevia and dates over a low heat. Let the mixture simmer, very occasionally stirring until apples have softened and absorbed the liquid. Take off the heat and set aside.
 
Next it is time to make your crumble! Add all ingredients bar the coconut oil into a mixing bowl and combine. Place your coconut oil into the mixture and rub in with your hands. Once a crumb like consistency is formed, or all ingredients are coated in the oil you're ready to go.
 
Place your stewed apples into a baking dish (or 4-6 individual ramekins) and top with the crumble mix. Pop in the oven and cook until top is nice and golden - normally around 15 minutes.

Whilst your crumble is in the oven it's on to making the custard. Place stevia (I use Natvia for those interested) and water into a saucepan. Bring the water to the boil and take off the heat once the stevia has dissolved.

Place the remaining ingredients (coconut cream, corn flour, egg yolks and vanilla) into a jug or mixing bowl and whisk until combined and smooth - we don't want any lumps!! Add this mixture into the water mix and turn back onto a low heat. Whisk mixture over the heat until thickened and a custard texture is achieved.
 
You can make the custard before hand, just simply make and place in a jug or bowl and cover and set aside in the fridge. Will last a couple of days - but with the way it tastes, it won't last long at all!
 
Once crumble is ready, take out of the oven, serve, dollop on your custard, eat and enjoy!  
 
 *You can also use half pears and half apples if desired! Pears also add a great taste.

Photography by Elisa Watson.

Photography by Elisa Watson.

TDF: Coconut, Fig & Pistachio Raw Cheesecake

This month I have got the absolute pleasure of being The Design Files Tasty Tuesday featured foodie! This is a HUGE deal for me. When I first found out I was going to be featured I was driving my car (oops..) and started crying with happiness. Not the best combination I'll give you the tip. I had the biggest smile on my face that day, and today I have got that same smile now that the first post has gone live. 

The guys at TDF (Lucy and Lisa) are absolute geniuses - and the website is nothing short of amazing. I have always looked at the Tasty Tuesday posts and ogled the awesome photos just in absolute amazement of what the chefs created and the beauty of the food styling and photographs.

In the first addition to my July Tasty Tuesday feature you can peep my Coconut, Fig & Pistachio Raw Cheesecake and each Tuesday this Month here on another recipe from me will be popping up on their site! I cannot wait for the other posts to go up - and simply cannot thank these guys enough for featuring little me on their blog and thank them for this opportunity.

Thank you to everyone also who has shown there support so far and subscribed. It's so overwhelming! I have not been able to wipe the smile off my face. If I could, I would hug each and every one of you and cook you all delicious things. 

Here are the photos from this weeks post below, and you can catch this weeks full post here

Recipe/Food Prep: Kate Bradley/Kenkō Kitchen
Styling: Lucy Feagins/The Design Files
Photography: Eve Wilson

 
tt-tdf-1-1.jpg
tt-tdf-1-2.jpg
tt-tdf-1-3.jpg
Food Styling - Lucy Feagins/The Design Files, Photography - Eve Wilson

Food Styling - Lucy Feagins/The Design Files, Photography - Eve Wilson

Coconut, Fig & Pistachio Raw "Cheesecake"

This cake was made through pure experimentation and ended up being absolutely delicious. I have always been intrigued by the idea of raw desserts and trying to avoid sugar and gluten in my cooking. This recipe just kind of fell together and I'm glad it worked out the way it did.

IMG_9599.jpg

Ingredients

Base
1 cup macadamia nuts
1/2 cup pistachio nuts
1/2 cup pitted dates
 1 tsp coconut oil
pinch salt

 Filling
 
1 1/2 cup cashews (soaked)
1/4 cup coconut oil
1/2 cup coconut cream
1/2 cup quark **
1/4 cup rice malt syrup
2 tbsp honey
1/4 tsp vanilla powder
1 ripe fig
couple drops liquid stevia.
 

IMG_9643.jpg

This recipe is super, super easy. I had it planned in my head and chucked things together in a processor and it worked perfectly.  The filling tastes like white chocolate heavenly I don't even know what.
 
First of all line the bottom of a springform tin with baking parchment. In a processor chuck in all the ingredients for the base and whiz until bread crumb size and sticking together. Press into bottom of tin and place in freezer.
Whilst that is in the freezer chuck all the ingredients for the filling bar the fig in the processor and blend until a smooth texture. Be careful not to over blitz as you don't want a dough to form!! Once mixture is smooth add in the fig chopped up to make it easier and blitz until smooth. 
 
Pour this mixture on top of the base and place back in freezer for around 3 hours. 
 
Take out of freezer 20 mins before serving. Chop up some figs and arrange on the top as well as some crushed pistachios and coconut flakes if desired.

** If wanting a vegan version omit the quark and use either coconut yoghurt or some sort of vegan ricotta. 

IMG_9676.jpg
Photography by Elisa Watson.

Photography by Elisa Watson.