Chocolate Popsicles and Cookbook Release in USA!
Chocolate, Mocha & Coffee Layer Cake // Kenkō Kitchen. Image taken from the Kenkō Kitchen Cookbook. Australian edition out now through Hardie Grant, out March/April through Hardie Grant UK and Rizzoli USA. Photography by Elis…

Chocolate, Mocha & Coffee Layer Cake // Kenkō Kitchen. Image taken from the Kenkō Kitchen Cookbook. Australian edition out now through Hardie Grant, out March/April through Hardie Grant UK and Rizzoli USA. Photography by Elisa Watson, styling by Kate Bradley (Kenkō Kitchen) and Sally Bradley.

To celebrate the Kenkō Kitchen cookbook being officially released in the USA today (3rd March 2015) I am posting this recipe extracted from the cookbook of my Chocolate Popsicles. Like all recipes in the book these are sugar free, vegan and gluten free! A must make for all! These treats are absolutely perfect  mourn the end of summer in Australia this past weekend I am posting a delicious summer recipe taken from my new cookbook the Kenkō Kitchen cookbook. This recipe is easy to make, is a million times healthier than their milk bar counterpart and are truly delicious. This is great to make to have for a healthy summer treat after a day at the beach, to make for your kids or just make and keep in the freezer for when you need a little something sweet!

This recipe is taken from the Kenkō Kitchen Cookbook available now around Australia and is available in the USA as of the 3rd of March (this Tuesday!!). Don't worry UK it will be available their in April and is available for pre-order now!


Makes 4–6 (depending on size of moulds)
Prep time: 30 minutes, plus 40 minutes setting

Popsicle sticks
Ice cream
400 ml (13 ½ fl oz) coconut cream (refrigerated)
125 ml (4 fl oz/ ½ cup) maple syrup
155 g (5 ½ oz/1 cup) cashews (soaked in water overnight)
¼ teaspoon salt
seeds from ½ vanilla bean

Chocolate coating
80 ml (2 ½ fl oz/⅓ cup) coconut oil
30 g (1 oz/ ¼ cup) cacao powder*
2 tablespoons stevia*
¼ teaspoon sea salt
slivered almonds to garnish

Begin by placing all the ice cream ingredients in a blender and blitz until smooth and creamy. Remove and pour into an ice cream maker, letting it churn for 14 minutes until a beautiful ice cream has formed.

Scoop the ice cream into popsicle moulds, press in the popsicle sticks and place in the freezer for 30 minutes or until frozen.

Mix all the chocolate coating ingredients in a bowl. Remove the set popsicles from the moulds.

Working quickly, dip each ice cream in the chocolate coating – the chocolate will begin to set very quickly on the ice creams as soon as the coconut oil hits the cold ice cream.

Sprinkle the almonds on the chocolate before it has set and dunk the popsicle in the chocolate again to coat the almonds.

Return to the freezer until they are ready to eat!

The Ultimate Valentine's Day Cake
Chocolate, Mocha & Coffee Layer Cake // Kenkō Kitchen. Image taken from the Kenkō Kitchen Cookbook. Australian edition out now through Hardie Grant, out March/April through Hardie Grant UK and Rizzoli USA. Photography by Elis…

Chocolate, Mocha & Coffee Layer Cake // Kenkō Kitchen. Image taken from the Kenkō Kitchen Cookbook. Australian edition out now through Hardie Grant, out March/April through Hardie Grant UK and Rizzoli USA. Photography by Elisa Watson, styling by Kate Bradley (Kenkō Kitchen) and Sally Bradley.

Valentine's Day is fast approaching and whilst it's not something I traditionally celebrate - Let's just say it's a long story involving my 11 year old self dropping a love heart cushion with two teddys hugging on it and the words 'I love you' inscribed onto my "boyfriends" doorstep and never receiving a valentines back (and still never receiving any valentine of any sort to this date - young love tragedy, I know) - I do like to take the day as an opportunity and excuse to bake something decadent and beautiful.

This is three layer cake which I am sharing with you is from my new cookbook the 'Kenkō Kitchen' cookbook. It is a Chocolate, Mocha & Coffee Layer Cake with Chocolate Avocado Mousse filling and delicious vanilla coconut and chocolate icing.  The recipe was posted last week very kindly by Sportluxe but I thought I should also share it here for all my subscribers and followers who may have missed it. This cake is beautiful in not only taste and but also in appearance. It definitely has the wow factor and whilst it may look crafty to make up I assure you it is very easy to bake, assemble and is fool proof to ice! You can make this for your special partner to share on Saturday or otherwise you can make it simply for your family, friends or even more importantly - yourself. 

You can still purchase the Kenkō Kitchen cookbook for 30% off RRP from David Jones stores across Australia as it's still in the Top 10 books this week! Otherwise you will find the book in all good bookstores and department stores across the country and online. For more information check out the cookbook page here

Please enjoy this beautiful decadent cake and remember to enjoy yourself this weekend! xx


Chocolate, Mocha & Coffee Layer Cake

Serves 6
Prep time: 30 minutes
Cooking time: 30 minutes

Ingredients

Cake base
225 g (8 oz/1 ½ cups) light buckwheat flour
240 g (8½  oz/1½ cups) brown rice flour
100 g (3½ oz/1 cup) ground almonds or almond meal
2 teaspoons baking powder
1 teaspoon bicarbonate of soda (baking soda)
1 tablespoon cacao powder
1 tablespoon tapioca flour
1 teaspoon salt
105 g (3½ oz/½ cup) stevia or coconut sugar
125 ml (4 fl oz/½ cup) rice malt syrup
250 ml (8½ fl oz/1 cup) plant-based oil
190 ml (6½ fl oz/ ¾ cup) coconut oil
250 ml (8½ fl oz/1 cup) plant-based milk 
30 g (1 oz) flaxmeal
125 ml (4 fl oz/ ½ cup) water

Mocha layer
60 ml (2 fl oz/ ¼ cup) espresso or cold brew coffee
30 g (1 oz/ ¼ cup) cacao powder

Coffee layer
80 ml (2½ fl oz/⅓ cup) espresso or cold brew coffee
1 tablespoon stevia
1 tablespoon buckwheat flour
1 tablespoon brown rice flour

Chocolate layer
40 g (1½ oz/⅓ cup) cacao powder 

Filling
1 avocado, stoned
1 banana
30 g (1 oz/ ¼ cup) cacao powder
45 g (1½  oz) stevia (or more if you prefer sweeter)

Icing
350 g (12. Oz/2 cups) stevia icing mix (Sporteluxe tip: try Natvia Icing Mix to taste)
1 teaspoon vanilla extract
125 ml (4 fl oz/½ cup) coconut cream, plus a little extra if needed
30 g (1 oz/ ¼ cup) cacao powder

Method

  1. To make the cake base, mix all the ingredients in an electric mixer until combined. Divide the batter into 3 separate bowls.
  2. Preheat the oven to 180°C (350°F).
  3. For the mocha layer, mix the espresso and cacao into the mixture in one of the bowls. Then pour the mixture into a greased 18.5 cm (7 ¼ in) cake tin.
  4. For the coffee layer, mix the espresso, stevia, buckwheat flour and brown rice flour into the second bowl and then pour into another greased cake tin.
  5. For the chocolate layer, mix the cacao into the third bowl and pour into another cake tin. Bake the cakes in the oven for 30 minutes or until a skewer comes out clean. Alternatively, if you only have one cake tin, you just repeat the process 3 times until you have cooked each cake.
  6. Let the cakes cool completely then remove from the tins.
  7. To create the filling, mix the avocado, banana, cacao and stevia and beat with an electric mixer until light and fluffy.
  8. Place the coffee layer cake on a plate and spread the top with the avocado mousse filling. Next, top with the mocha cake, and spread over more mousse, and finally add the chocolate layer on top.
  9. To make the icing, mix all the ingredients, except the cacao, and beat with an electric mixer until combined. Halve the mixture and stir the cacao into one half. Spread the mixtures onto the cake, a little bit of each at a time (I use a cheese knife), swirling occasionally until the cake is fully coated. Place in the refrigerator until you’re ready to serve.
Chocolate, Mocha & Coffee Layer Cake // Kenkō Kitchen. Image taken from the Kenkō Kitchen Cookbook. Australian edition out now through Hardie Grant, out March/April through Hardie Grant UK and Rizzoli USA. Photography by Elis…

Chocolate, Mocha & Coffee Layer Cake // Kenkō Kitchen. Image taken from the Kenkō Kitchen Cookbook. Australian edition out now through Hardie Grant, out March/April through Hardie Grant UK and Rizzoli USA. Photography by Elisa Watson, styling by Kate Bradley (Kenkō Kitchen) and Sally Bradley.

KENKŌ KITCHEN COOKBOOK RELEASE
Coconut Ice Cream 6 Ways // Kenkō Kitchen. Image taken from the Kenkō Kitchen Cookbook. Australian edition out now through Hardie Grant, out March/April through Hardie Grant UK and Rizzoli USA. Photography by Elisa Watson, styling by Kate …

Coconut Ice Cream 6 Ways // Kenkō Kitchen. Image taken from the Kenkō Kitchen Cookbook. Australian edition out now through Hardie Grant, out March/April through Hardie Grant UK and Rizzoli USA. Photography by Elisa Watson, styling by Kate Bradley (Kenkō Kitchen) and Sally Bradley.

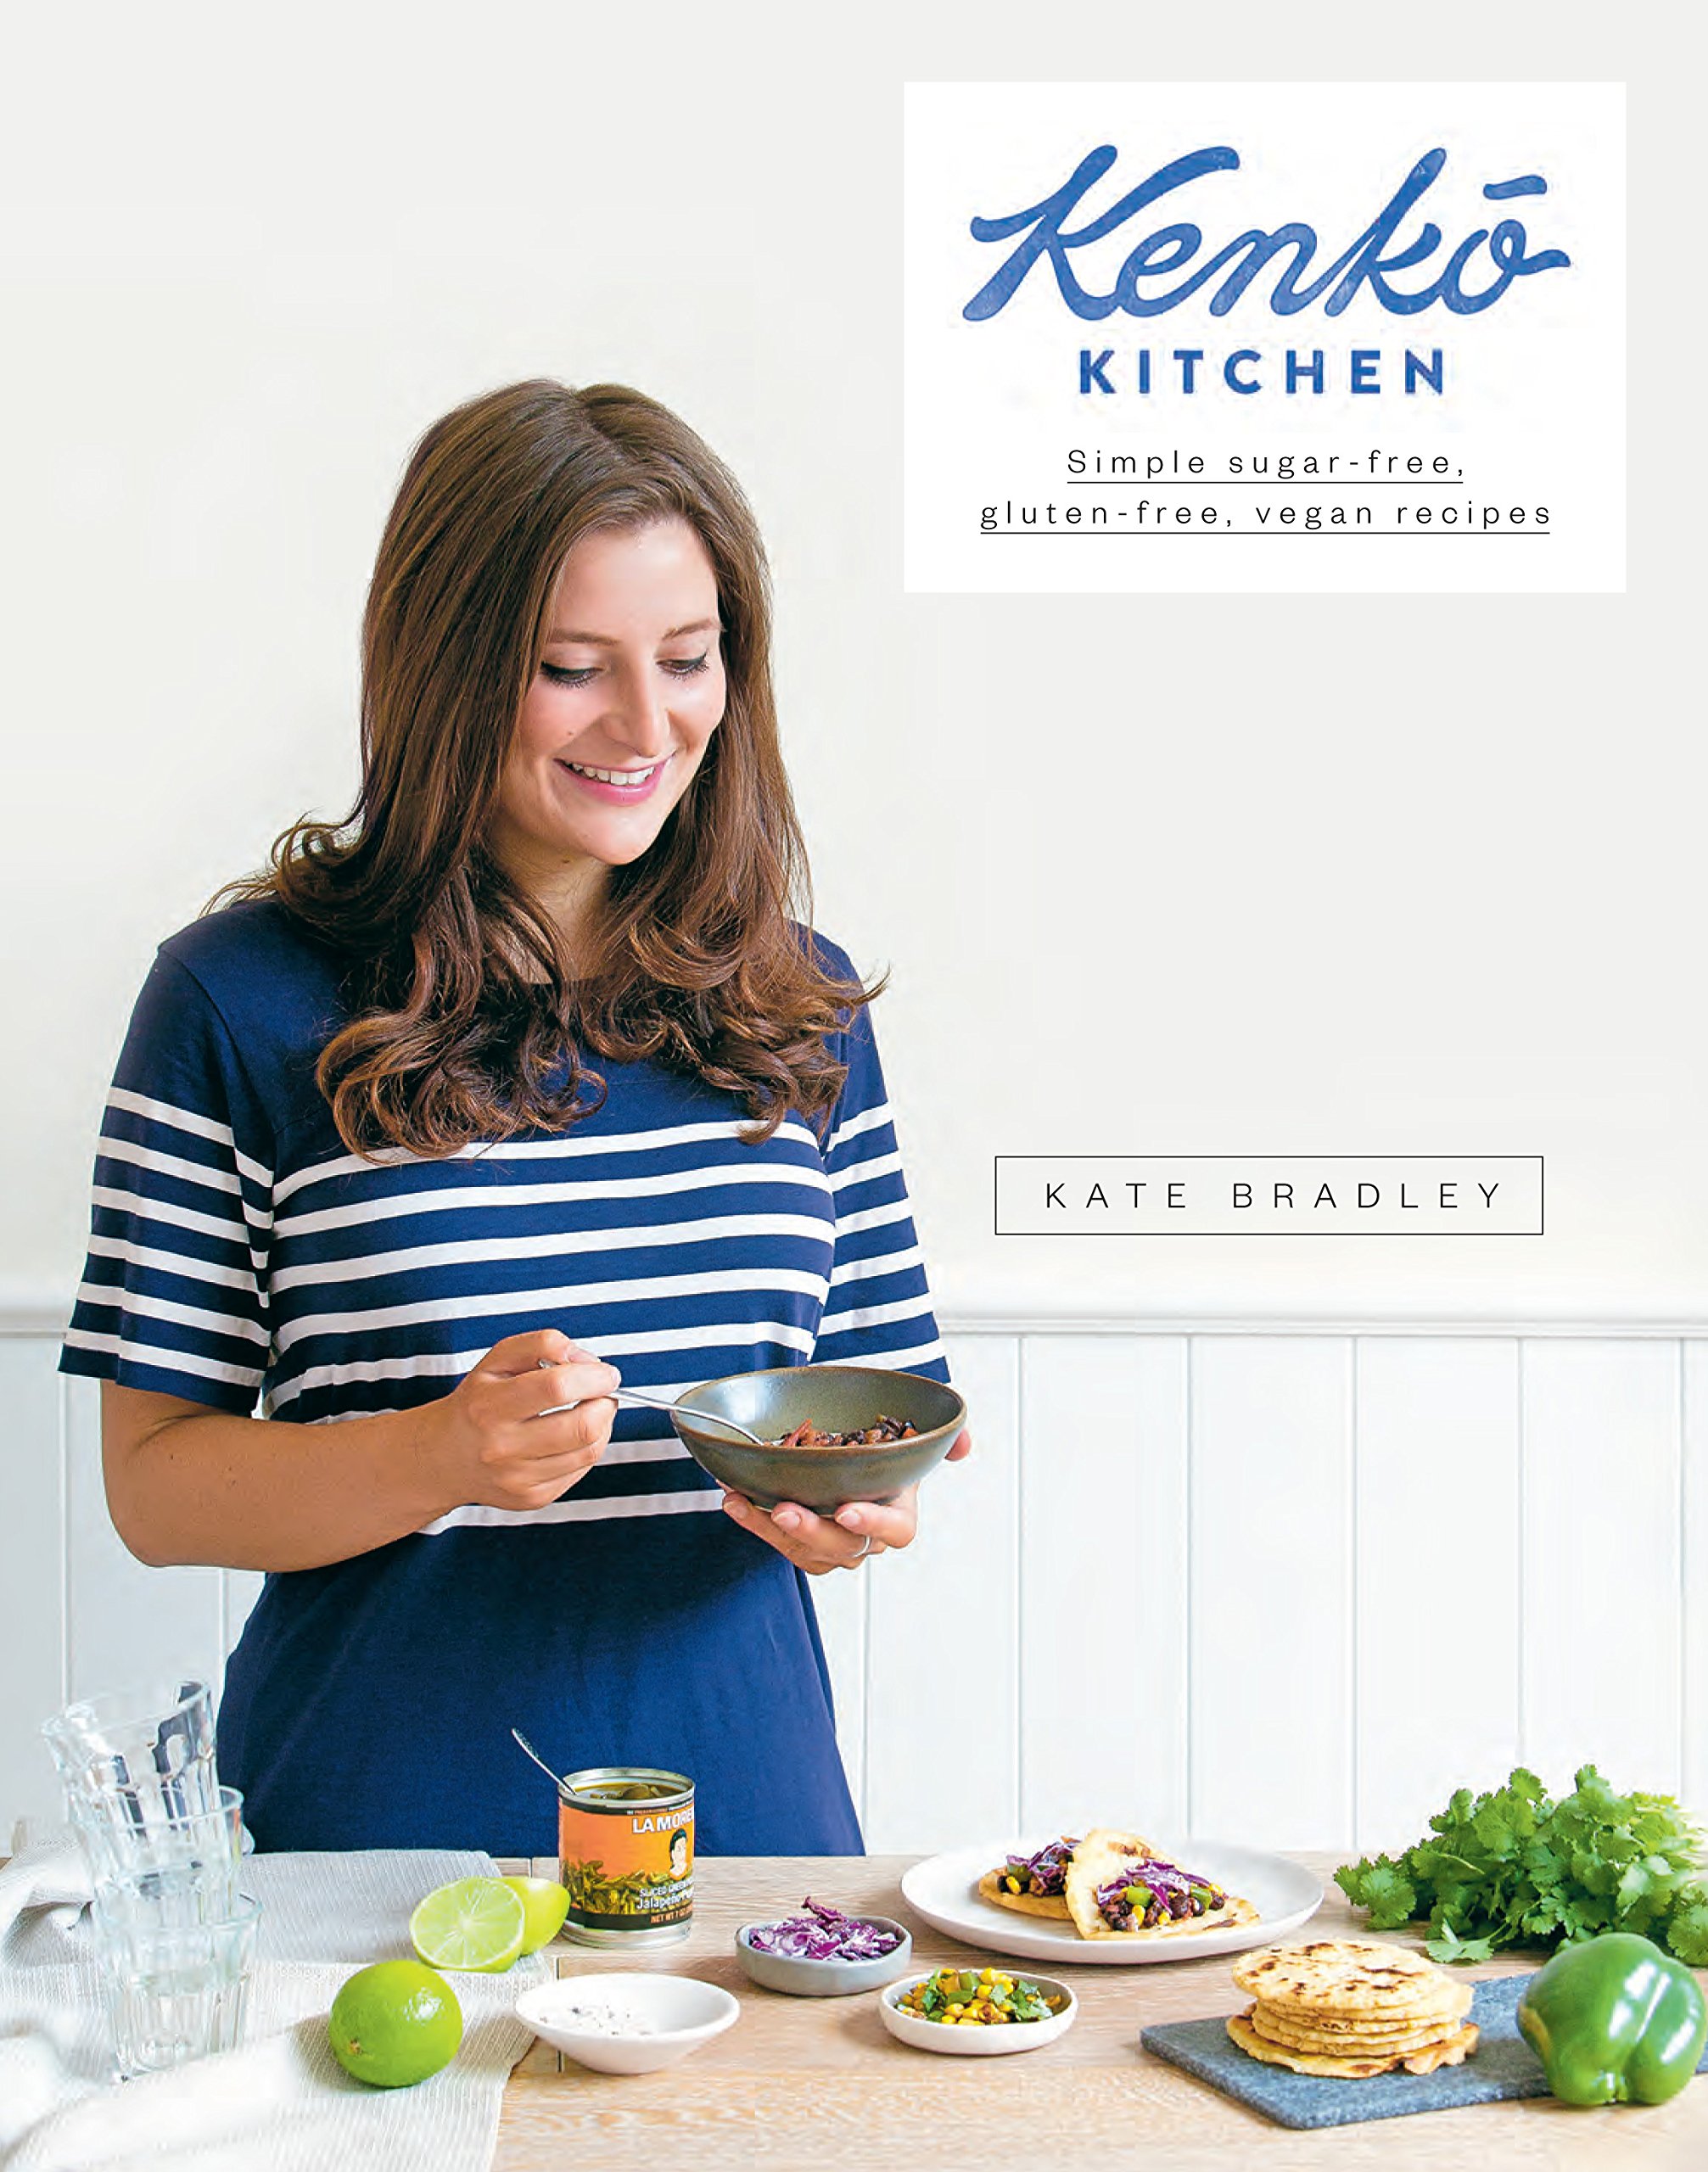
And so it is finally here, the Kenkō Kitchen cookbook has now officially hit stores across Australia. I am a mixture of both nervous and excited waiting to see everyones reactions to the book we worked so hard on. On the official day of the cookbooks release, Sunday February 1st, I went around to various bookstores with my parents (who were even more nervous than I was!). First we went to a shopping centre nearby to see if anyone had put it on the shelves (nobody had yet), and then went to Readings in St Kilda where they were already down to last two copies. It still hadn't sunk it yet that I was looking at my own book sitting next to Donna Hay and Jamie Oliver. We then went to check out another Readings where they had the book on display and then onto a David Jones store. This was when everything got a little too overwhelming. David Jones had it on display in four different spots! I went to buy a book and the lady asked me if the book was good, I said "I hope so as I made it!" and with that I completely burst into tears and the reality of the situation had sunk in. I made a book with my amazing photographer Elisa Watson and it was now on the shelves in stores. Something I had only dreamed of and never thought would ever become a reality.

I really cannot thank the team at Hardie Grant more for allowing me to create a book which I believe in so strongly. Although vegan, gluten free and refined sugar free recipes on their own are becoming more common in our society it is quite rare to find a recipe which accounts for all three. This is not to say only vegans, coeliacs or those with intolerances should or can buy my cookbook as it really was made for everyone. I tried to make a book which would be as inclusive as possible whilst remaining simple in it's methods and using easy to source ingredients. This accessibility factor is something I believe in very passionately and it is something we need to be more aware of. Not everyone can afford to do $300 grocery shops every week to feed their family and not everyone has the time to run from specialty shop to health food shop to track down niche expensive ingredients. For this reason in the Kenkō Kitchen cookbook I have used as many ingredients as I could which are easy to pick up from your local supermarket. 

The Kenkō Kitchen cookbook is a collection of not only my favourite recipes with a healthy twist but also includes raw, detoxifying and macrobiotic recipes. I have tried to make this first cookbook for newcomers to healthy eating or those with speciality diets as well as being something which I hope will continue to inspire the long-term health conscious food lovers, vegans and those living with intolerances and allergies. From nutritious breakfast options such as porridges, waffles, granola and homemade vegan yoghurts, to light-but-filling lunch options and delicious dinners you should be able to find that there is something in the cookbook for every occasion.

I made this cookbook with love and passion for you. I wanted to create something which would inspire other young people and adults to cook and eat healthy nourishing dishes at home with ease. I want to get people away from thinking healthy means only eating lettuce, diet yoghurt and celery sticks (it certainly isn't!!) and I want to stop people being fearful of food. We need to get back to eating real food made using beautiful ingredients and taste the love and nourishment in each dish.  I hope with this first cookbook I achieve this even if only on a small scale. 

Kenkō Kitchen Cookbook // All images taken from the Kenkō Kitchen Cookbook. Australian edition out now through Hardie Grant, out March/April through Hardie Grant UK and Rizzoli USA. Photography by Elisa Watson, styling by Kate Bradley (Kenkō Kitchen) and Sally Bradley.

I want to thank a few beautiful bloggers who have featured the Kenkō Kitchen cookbook on their websites and have posted recipes from the book in honour of it's release. You can check out an interview with myself and a recipe for that amazing caramel slice on Jessica Cox Nutritionist's website, the recipe for the Rainbow Stirfry on George Eats and the recipe for those amazing Sweet Potato Mushroom burgers on The Holistic Ingredient. Alongside this I would also like to thank the numerous publications who have featured the cookbook such as Inside Out and Nourish magazine as well as Yen for publishing a very kind review!

Thank you to everyone who has supported me in the making of this book and been a huge help in the process. The biggest of thanks to my mum and dad who allowed me to turn the kitchen and house upside down for months and for always being their to lend a helping hand. I still am yet to catch my breath from it all and really come to the reality of this whole thing (I swear it's still not real!). I cannot wait to see what is next. xx


THE HARDBACK COOKBOOK IS NOW AVAILABLE FOR order/pre-order THROUGH BOOK WORLDBOOK DEPOSITORYBOOKTOPIAAMAZON AND RANDOM HOUSE NZ.

RELEASED 1ST FEBRUARY 2015 IN AUSTRALIA AND THE UK, MARCH 3RD IN THE US, CANADA AND REST OF THE WORLD.

Lotus Root Chips with Matcha Salt
Photography by Elisa Watson. Styling by Kate Bradley (Kenkō Kitchen) & Elisa Watson.

Photography by Elisa Watson. Styling by Kate Bradley (Kenkō Kitchen) & Elisa Watson.

This recipe is inspired by something I had on a recent trip to Japan where we went to a 7 story restaurant that our local Tokyo friend had taken us to. The first thing he ordered from the menu which was written completely in Japanese (so lucky we had him there!) was this dish - fried lotus root chips with matcha salt. My mind, even when he said it, got completely blown, and when I actually tasted it I knew it was absolutely magnificent and something I just HAD to recreate for you guys. Lucky for me (and for you) this dish is super super simple and can be done in as little as 15 minutes! It is the perfect snack to have with drinks, to serve up for kids as a side replacement for chips and is just perfect as a gourmet nibble.

The other amazing thing about this dish is the pure amount of health benefits that the lotus root (and matcha) hold. Lotus root, which has long been used in Asian cooking is known for improving digestion, reducing cholesterol, lowering blood pressure, boosting the immune system, helps in preventing numerous forms of cancer, balances mood, can help in relieving depression and increases blood circulation. The lotus root has a potato like texture which makes it perfect in stews, soups, curries and of course for making chips! 

In other super exciting news it is now only two sleeps until the Australian release of my cookbook officially hits shelves in stores around the country! It is completely bizarre to think that I will be able to walk into a store and see my book sitting there and I swear it's still not real! I keep having to pinch myself! I am so excited and nervous to see what you all think of my first cookbook and I cannot wait to see what you cook up first! The cookbook will be available at all good retailers across Australia including Readings, David Jones, Angus & Robertson and in many other shops and cafes! If you're not able to pick up a copy in person you can however order the book from Book World, Book Depository, Booktopia, Amazon, Random House NZ or Angus & Robertson online to name a few! So excited!! 

Until then please enjoy this delicious recipe and don't forget you can stay updated on my Instagram or Facebook for more information on the cookbook! xx


Serves 2-4
Prep time: 5 minutes
Cooking time: 10-15 minutes

Ingredients
1-2 large lotus roots
2 tbsp coconut oil (plus a little extra if needed)
1 tbsp matcha powder
1/4 cup sea salt or pink salt flakes

Method
Cut your lotus root(s) into 1/2 cm thick pieces. Place into a fry pan with the coconut oil and fry for 5-10 minutes until golden on each side. Once golden, remove from heat to avoid burning and place onto some kitchen towel to remove any excess oil.

For the salt, simply mix the matcha powder into the salt flakes until combined.

Then it's time to dip the crunchy delicious lotus root chips into the green salt and enjoy immediately!

A New Year, A Shepard's Salad & Fava Bean 'Meze'
Photography by Elisa Watson, Styling by Kate Bradley (Kenkō Kitchen) for Nourish Magazine. Bowls and plate from op shop. Napkin by Fog Linen. Turkish tea glass from Mediterranean Pantry. 

Photography by Elisa Watson, Styling by Kate Bradley (Kenkō Kitchen) for Nourish Magazine. Bowls and plate from op shop. Napkin by Fog Linen. Turkish tea glass from Mediterranean Pantry. 

My first post and recipe for the year and I am so excited. 2014 was a very big year - I contributed to nation wide magazines, I started taking my own cooking classes based on the whole foods plant based diet, I wrote my first ever cookbook which is entirely gluten and sugar free as well as vegan. Alongside this I became a lot healthier. Not just healthier in my body but healthier in my mind. 2014 was the first year I really learnt to appreciate myself for who I was and the way my body was, instead of beating myself up for not being 10kgs lighter. 

Like many young girls (and boys) growing up I had a lot of insecurities and body image issues. When I first made my blog these insecurities and issues heightened. I wasn't like all the other health bloggers. I wasn't posting photos of myself in a bikini. I didn't have abs. I couldn't do flexible yoga poses. I didn't fit into the same size clothes and couldn't afford all the latest and hottest Nike wear. All these things started making me question and doubt myself. Maybe I wasn't good enough for this industry. Maybe I wasn't thin enough or beautiful enough to make it in this industry. I would constantly bring myself down that I wasn't the same as so many of these amazing, beautiful and talented women and men out there. 

Then something clicked. I realised that I was fine. My weight didn't matter! My appearance didn't matter! I worked out 4-5 times a week, I ate well 98% of the time and I enjoyed myself. I still appreciated and was in awe of these other women as I knew how hard they have worked for their bodies but my body just wasn't there and it was OK. I didn't have to be posting selfies every day, or photos of myself in a bikini as It just wasn't who I was and it isn't who I have ever been. 

So this year instead of setting myself self deprecating and self shaming resolutions like "I must lose 10kg", "I must go to the gym every single day", "I mustn't eat a single bad thing" convincing myself of how happy I would be if I was thinner, then beating myself up for when I slipped and ate a cookie with a friend or missed a day at the gym, or just didn't lost weight. This year I would set myself resolutions which would make me feel good and inspire me. This year I want to become an even healthier version of myself, I want to help to make others healthy, happy and feel confident in their bodies no matter what they look like, I want to spend more time on things I love and not spending them on things that make me feel like I am worthless.

2015 is going to be a big and powerful year for many of us and I feel very happy that my mindset is where it should have been years ago. Bring on the new year!


My first recipe for the year is a recipe which featured in Nourish Magazine last year. They are the perfect sides or starters to a meal. A delicious traditional Turkish salad which can be found on every menu in Turkey and the insanely yummy Fava - a fava/broad bean, olive oil and dill puree which is the perfect accompaniment to so many dishes.

I hope you have all had a relaxing and great holiday period and I look forward to working towards a  happier and healthier community with you this year!

Enjoy these recipes and I look forward to sharing more with you! xx


FAVA (FAVA/BROAD BEAN PUREE)

Serves 6
Prep time: 10 minutes Cooking time: 25 minutes

Ingredients

2 cups dry fava beans 3 cups water
3 big onions (diced)
1 tsp salt
3 tsp stevia or xylitol

1/4-1/3 cup olive oil
1/4 bunch dill

Method
In a frypan, heat up the 1 tbsp rice bran oil and add in the chopped onions. Cook for 5 minutes or until translucent and remove from heat.

In a medium saucepan bring the water to a boil and
add in the fava beans. Reduce to a low heat and let simmer for 20 minutes or until the beans have softened and begun to “melt”.

Place the cooked onions, softened fava beans, dill, salt, stevia and olive oil into a blender. Blitz until smooth, remove and move into a pyrex dish. Let the lava set in the fridge and enjoy with any meal or on it’s own!

ÇOBAN SALATASI (SHEPHERDS SALAD)

Serves 4

Prep time: 10 minutes

Ingredients
2 cucumber (sliced)
250g mixed lettuce
1/2 red onion (sliced)
2 tomatoes (chopped)
1/4-1/2 green capsicum (diced)
1/2 cup flat leaf parsley (chopped)
1/4 cup fresh mint (chopped)

For the dressing
1 tsp salt
1/4 tsp black pepper
1/2 tsp sumac
1 tsp pomegranate molasses
juice 1 lemon
3 tbsp olive oil
1/3 cup feta (crumbled)
1/4 cup walnuts halves

Method
Place all salad ingredients into a bowl and toss together.

To create the dressing, simply mix all ingredients together and set aside.

Just before serving toss the salad with the dressing, sprinkle on the walnuts and crumble with the feta.
 

Kate Bradley Comments
Announcing the "Kenkō Kitchen" Cookbook!
katecookbook

It is with much pleasure and excitement (I'm going to cry!) that I share with you this news today which I have been trying so hard to keep in! Since January 2014 Elisa Watson (my photographer), myself and and the amazing team at Hardie Grant have been working on something very special (and in my opinion, very beautiful) due for release in the new year. It has been a  long process involving a lot of hard work, a lot of long days, late nights, a whole lot of food and a lot more dirty dishes (thank you mum for being their to save the kitchen!) to create the most exciting and definitely biggest project from Kenkō so far. This something special is my first ever COOKBOOK titled Kenkō Kitchen due for release in the new year.

After giving up gluten, dairy, refined sugars and all processed foods in late 2012 I realised how hard it was to find recipes which first of all catered for my needs and more importantly finding recipes that still tasted good when they were without these items.  I wanted to create something which made this process of giving up certain ingredients in the kitchen easier and didn't hinder how delicious a meal was. I wanted to create something which meant that meals cooked could be shared with everyone despite their allergy or lifestyle choices and most of all I wanted to create recipes which made plant-based eating simple and achievable in our everyday busy lives. 

To share this passion of whole foods with the world, and to show them it is easy to make dishes simple and delicious using only beautiful and natural ingredients I started my website. Fast track to almost a year and a half later and I now sit here with the first fast tracked copy of my very first cookbook on my lap. When Hardie Grant first approached me to create a cookbook I felt so overwhelmed and shocked. At this stage I had only had my website for a few months and a cookbook whilst it was something I had dreamt about doing was never something I thought would actually happen! I cannot thank the team at Hardie Grant for their constant belief in me and their overwhelming support. This cookbook is 100% pure love and each recipe has been very meticulously curated to ensure that eating healthily is not a burden and is not hard but instead is simple, delicious and easy.

I could not have done this without the team at Hardie Grant believing in me, and I most certainly could not have done it without my photographer Elisa. Elisa Watson has been with me since day one of Kenkō Kitchen making sure my recipes look as good on the screen and page as they look and taste in real life. She has been the biggest supporter of Kenkō and has done so much for myself and the Kenkō Kitchen project I don't even know how to begin expressing my gratitude for her! Thanks to Elisa the photographs in the cookbook are beyond stunning and without her I don't know where I would be! 

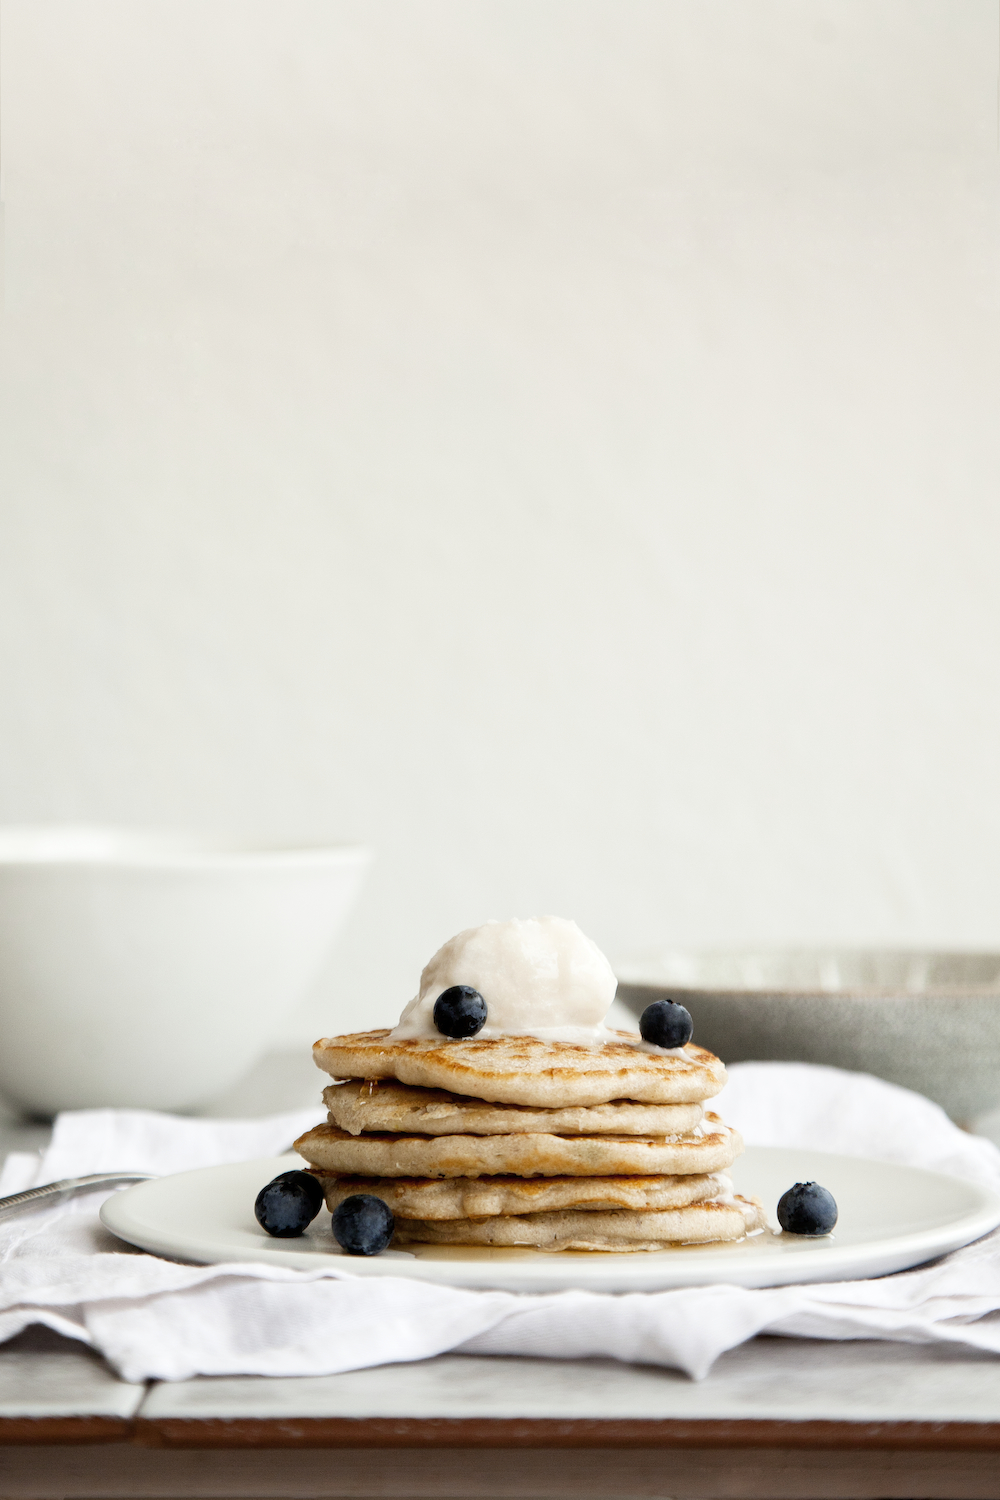
I cannot wait to share this book with you all and show you all the amazing recipes I have been working on. In this book you will find over 100 recipes for super delicious salads, pancakes with healthy ice cream, waffles, granola, decadent desserts, mouth watering mains and a whole heap of drinks and condiments like vegan goat cheese and ricotta. There really is a meal for every occasion in the Kenkō Kitchen cookbook! The hardcover cookbook will be released through Hardie Grant AU and Hardie Grant UK from February 1st and also Rizolli in the USA from March 3rd.

THE HARDBACK COOKBOOK IS NOW AVAILABLE FOR PRE-ORDER THROUGH book worldBOOK DEPOSITORYBOOKTOPIAAMAZON AND RANDOM HOUSE NZ.

RELEASED 1ST FEBRUARY 2015 IN AUSTRALIA AND THE UK, MARCH 3RD IN THE US, CANADA AND REST OF THE WORLD.

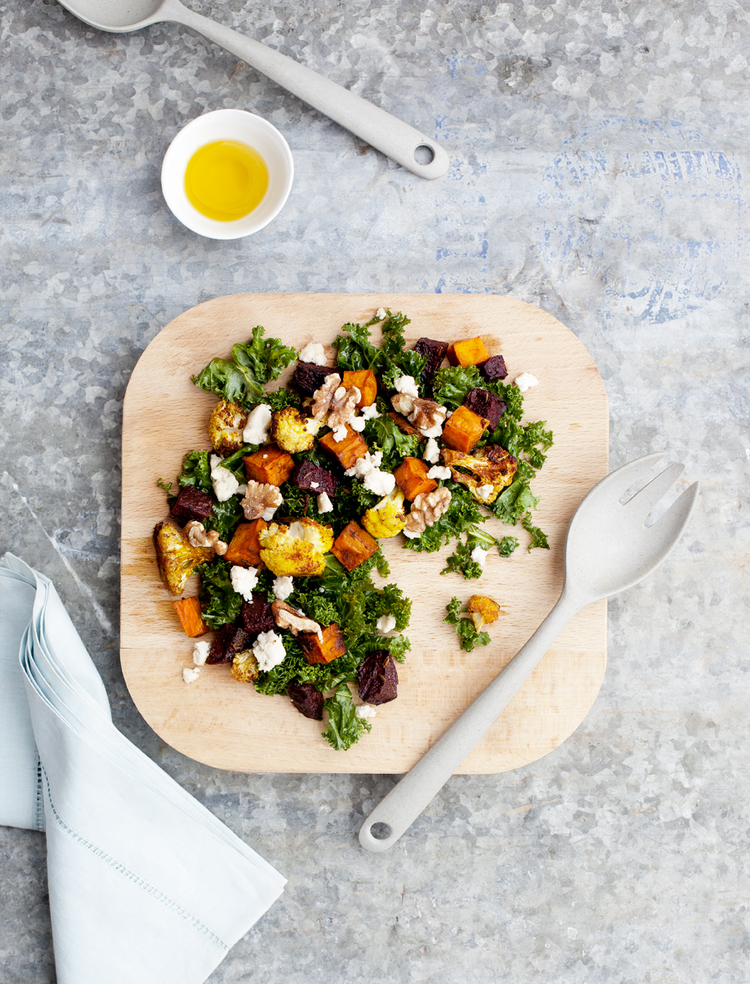
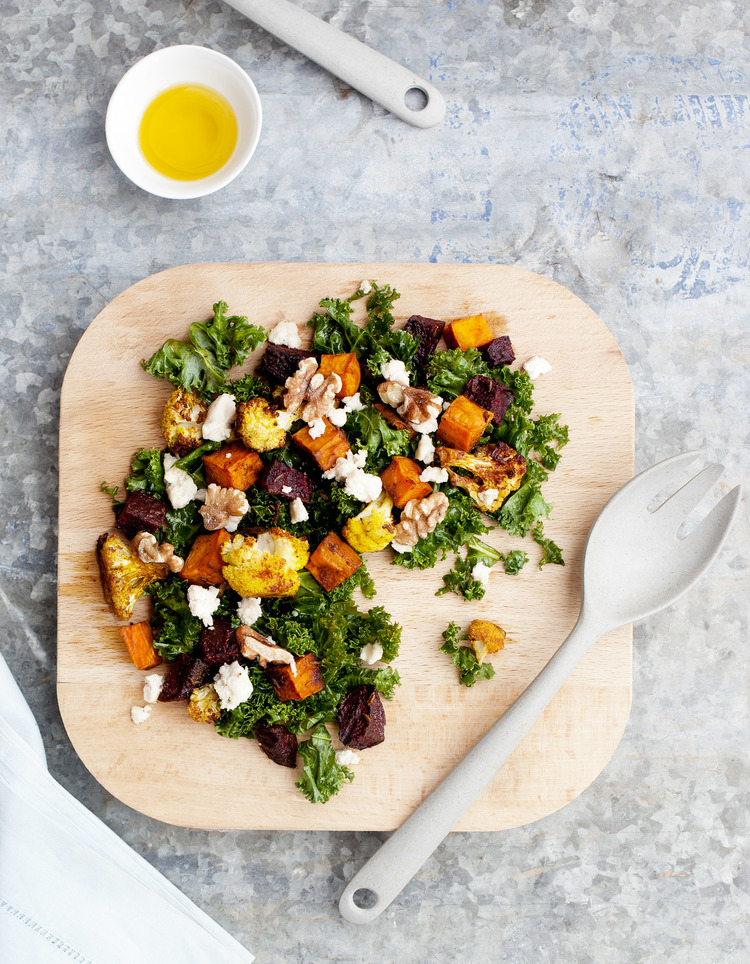
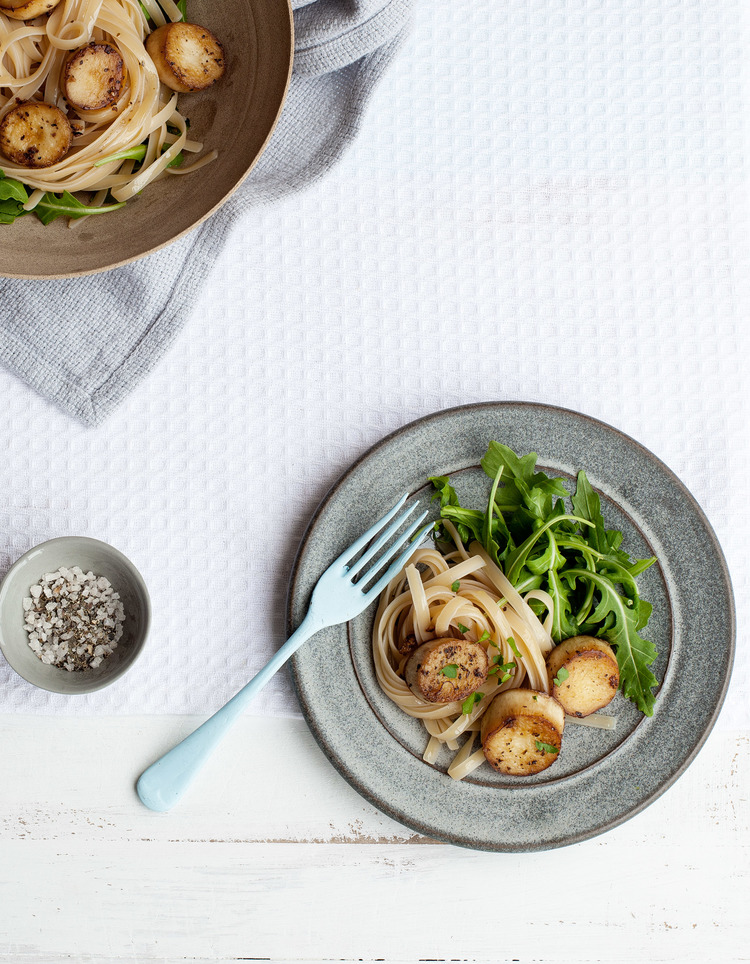
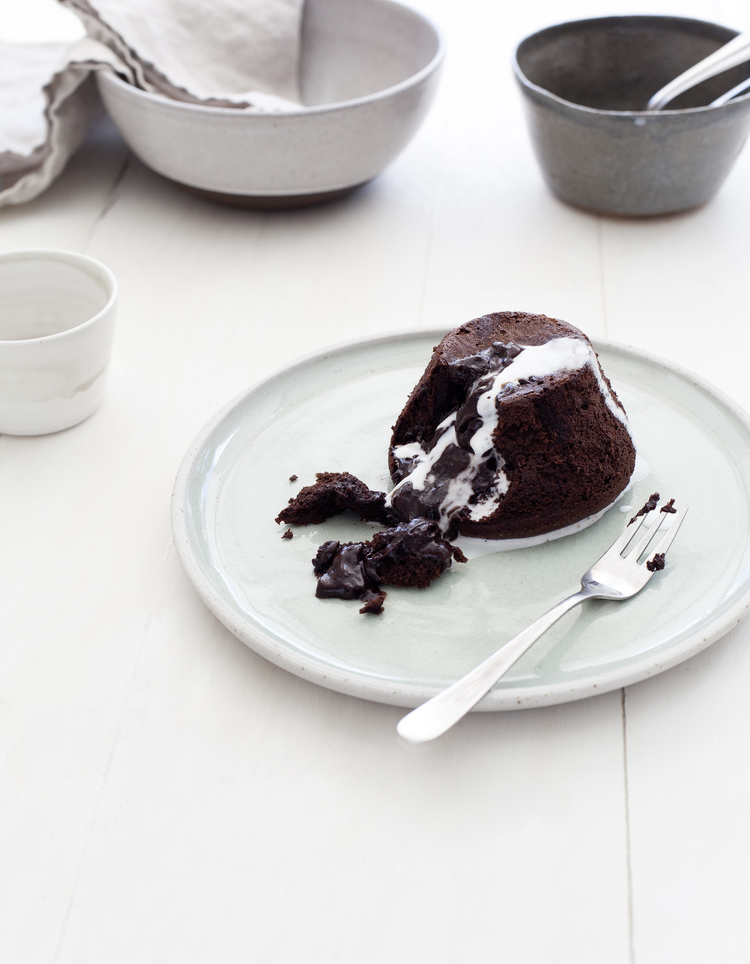
"Kenkō Kitchen is a stunningly photographed collection of simple, delicious, and healthy recipes which are completely vegan as well as gluten- and refined sugar-free. We all know that we should be eating more vegetables and whole foods, but how do we incorporate healthier choices into our busy everyday lives? In Kenkō Kitchen, Kate Bradley shares a range of healthy and delicious foods that are easy to prepare, with ingredients available from the local store. Featuring a host of vegan recipes that are also gluten- and sugar-free for those with fructose and gluten intolerances, and delicious raw food, detoxifying, and macrobiotic recipes, Kenkō Kitchen is perfect for everyone from whole foods newcomers to long time whole-foods devotees, health-conscious food lovers, vegans, and those with dietary intolerances. Think nourishing breakfast options such as granolas, porridges, and homemade vegan yogurts; light but filling lunch options such as roasted vegetable salad with cashew "goat" cheese and walnuts; divine dinners such as garlic and kelp king oyster "scallops" with fettuccine and rocket, as well as a host of classic comfort foods with a healthy twist and sweet treats such as chocolate molten puddings. Featuring stunning photography throughout, Kenkō Kitchen will show you just how quick and easy it is to whip up mouthwatering and wholesome vegetarian fare that will leave you feeling incredible inside and out.

Containing over 100 vegan, gluten free, sugar free and dairy free recipes spread across 208 pages Kenkō Kitchen is a book which help you find a meal for every occasion."

Kate Bradley Comments
Double Chocolate Ice Cream Sandwiches
Kenkō Kitchen Ice Cream Sandwiches. Tea towel by Spin Spin. Small cup and plate from Merci Paris. Large plate from Op Shop. Styling by Kate Bradley, Photography by Elisa Watson.

Kenkō Kitchen Ice Cream Sandwiches. Tea towel by Spin Spin. Small cup and plate from Merci Paris. Large plate from Op Shop. Styling by Kate Bradley, Photography by Elisa Watson.

It's been a long time in-between posts I know, and I'm sorry! As some of you may know recently I went to Japan to do some food research and travel (which was amazing, expect a full post on this very soon) then almost as soon as I came back I was in hospital for a week (which was not so amazing)! However everything is all back to normal and so you can expect to see two posts a week on Kenkō again!

Today I present you with one of my most favourite recipes for summer desserts. It fulfils all chocolate and ice cream cravings and they are almost completely guilt free! These delicious Double Choc Ice Cream Sandwiches are not only vegan but they are also refined sugar free and gluten free! These are easy to whip up and will make any child or adult happy. They are great to make for special occasions or just to put in the freezer for when you want something a little bit naughty! These can be made in advance and can be left in a container in the freezer for up to 2 months, however I will be amazed if you can make them last that long!

I hope you all enjoy this super delicious recipe and I cannot wait to keep sharing more amazing whole food recipes with you!


Make/Serves: 4-6
Oven temp: 180 degrees celsius
Cooking time: 10 minutes
Prep time: 40 minutes

For the Chocolate Sugar Cookies


Ingredients
1 1/2 cups buckwheat flour + extra for dusting
1 cups brown rice flour
1/4-1/3 cup cacao (depending on how chocolatey you like it!)
3/4 cup stevia or xylitol
1/2 tsp salt
1 tsp baking powder
1/3 cup coconut oil
2/3 cup plant based milk
2 tsp vanilla essence

Method
Place all ingredients into a stand alone mixer and beat on a medium setting for 5 minutes or until a dough has formed. 

Roll out the cooking mixture to 1/2cm thick on a well floured surface, adding more flour as needed.

Cut out 9cm (3 1/2 in) circles and place onto a lined baking tray. Cook for 10 minutes. Remove from the oven and allow to cool completely on the tray. 
 

For the Chocolate Ice Cream

Ingredients
1 400ml tin coconut cream
1 cup cashews (soaked for at least 4 hours or overnight)
1/2 tsp vanilla
1/4 tsp salt
1/2 cup maple syrup

3 tbsp cacao (or more if you like it super chocolatey!)

Method
To begin, we will start by making the ice cream. In a food processor or blender, mix together the maple syrup, cashews, vanilla salt and coconut cream. Once smooth place mixture in an ice cream maker for 15 minutes or until set.

Remove from ice cream maker and into a lined brownie tin. Flatten out and allow to freeze for 20-30 minutes.


To assemble


Using a large round scone or cookie cutter, cut rounds into the ice creams and then sandwich between two of the shortcrust rounds.

Place back in the freezer until ready to eat!

Kenkō Kitchen Ice Cream Sandwiches. Tea towel by SpinSpin. Small cup from Merci Paris. Large plate from Op Shop. Styling by Kate Bradley, Photography by Elisa Watson.

Kenkō Kitchen Ice Cream Sandwiches. Tea towel by SpinSpin. Small cup from Merci Paris. Large plate from Op Shop. Styling by Kate Bradley, Photography by Elisa Watson.

Kate Bradley Comment
Sigara Börek (Spinach & Feta Cigars)
Styling by Kate Bradley and Elisa Watson. Photography by Elisa Watson.

Styling by Kate Bradley and Elisa Watson. Photography by Elisa Watson.

Today I bring you part two of my Turkish family recipes handed down to me by my new aunty and grandmother. This recipe is for another dish that Yaprak (my partners aunty) made for us in Turkey on that very first night we arrived, and then many times later throughout our trip. These little mouthfuls are absolutely beautiful. The thin pastry is crunchy and the inside is perfectly salted and soft. You can change up the filling to however you like, whether it be to include mushrooms, halloumi, nuts, use only spinach or kale for vegans or even made sweet with a honeyed ricotta. These morsels aren't exactly the healthiest thing in the world but having a treat like this every now and then is definitely not forbidden in my eyes.

You can cook these in the oven or deep fry them - it's completely up to the individual which you choose to use. In both cases they end up crispy and totally delicious so you're not at a loss however you decide to make it. 

These pastries are absolutely beautiful to make if you have family or friends coming over as a delicious snack, or even served up before dinner as an entree. After you make them you can keep them in a container in the fridge or freezer and pull them out when you're ready to cook them. They last a while and are perfect heated the first time and even when reheated!

The most important thing about Turkish cooking is to put love in to it. Put as much love into the food as you can and there is no way it can taste bad. The food in Turkey is simple and easy to make, and more often than not uses very few ingredients. So it all comes down to the person making the food. If you're stressed or unhappy - your food will show it. If you're happy, take your time and really appreciate the ingredients and the dish then it will turn out perfect. Make food to share, make food with the help of others and just enjoy it. This is what food is for, to bring people together and to nourish our bodies. Don't resent food, and don't stress about putting something which isn't 100% "clean" into your bodies as it just causes a weird relationship with food which can only turn out bad! Enjoy food! Treat yourself on occasion and just appreciate it. Appreciate every last bit and don't waste a thing. If I learnt anything from the people of Turkey it is that, love and appreciate every mouthful.

Have a perfect day everyone!


 Serves 10
Prep time: 20 minutes
Cooking time: 20minutes

Ingredients
500g feta cheese (crumbled)
1 cup spinach
1/2 tsp cracked black pepper pinch salt
1 egg
1/2 cup chopped parsley
turkish börek/filo pastry
rice bran or olive oil for frying

Method
Place all ingredients except the pastry and olive oil into a bowl and mix to combine.

Fold the turkish pastry (large round sheets), one sheet at a time into half. then quarters. Cut each quarter into even thirds and place your newly cut long triangles aside.

Grabbing one piece of cut pastry at a time, place 1 heaped tsp of mixture near the bottom of the triangle. Fold in the sides and then roll the pastry up into a cigar.

Brush the final piece of the pastry with water and close. Set aside your cigar and repeat until all mixture has been used up.

Fill the bottom of a fry pan or saucepan with oil and heat until boiling point. Gently place in a few cigars at a time and let shallow fry for a few minutes on each side until golden and crisp. Remove and place onto some kitchen towel to remove any access oil.

Enjoy immediately or if consuming later, store in an air tight container in the fridge and reheat in the oven.
  

Kate Bradley Comments
Mücver (Zucchini & Dill Fritters)
Linen napkin from Fog Linen. Big plate from Freedom. Small grey dishes found in Turkey. Smaller white plates from Daiso. Cutlery from op shop. Styling by Kate Bradley (Kenkō) and Elisa Watson, Photography by Elisa Watson. 

Linen napkin from Fog Linen. Big plate from Freedom. Small grey dishes found in Turkey. Smaller white plates from Daiso. Cutlery from op shop. Styling by Kate Bradley (Kenkō) and Elisa Watson, Photography by Elisa Watson.
 

The beautiful food we gorged on our second day in Turkey containing shepards salad, fresh peppers, cress, fava, dolma, mücver and more.

The beautiful food we gorged on our second day in Turkey containing shepards salad, fresh peppers, cress, fava, dolma, mücver and more.

The beautiful breakfast spread we got presented with just hours after this 5AM feast when we had woken containing various cheeses, labneh, various marinated olives, simit, fresh peppers, tomato, cucumber and more! All served with a glass of fresh le…

The beautiful breakfast spread we got presented with just hours after this 5AM feast when we had woken containing various cheeses, labneh, various marinated olives, simit, fresh peppers, tomato, cucumber and more! All served with a glass of fresh lemon juice!

Earlier in the year I was lucky enough to go on a holiday to Turkey with my boyfriend to visit his family and see his country. When we first landed off the plane in Ankara, Turkey it was about 3AM in the morning. By the time we got to his aunt Yaprak's house it was around 5AM in the morning. However as soon as we entered the house, despite the time, there were about 15 different dishes already prepared which were quickly pulled onto the kitchen table for us before we could open our mouths. We were not allowed to go to bed until we had eaten, and in true Turkish style, one plate was not considered eating - we had to have at least two each. The first thing that caught my eye, and my tastebuds was something my boyfriend had already hyped to me before we went to Turkey "these things are the best ever - you can just eat 10 and not even realise!" and he was right. Although I didn't eat 10 that first night, these little beautiful zucchini & dill fritters also known as Mücver (Mooj-ver) were so light, delicate and flavoursome that it was impossible not to fall in love straight away.

Over my time in Turkey, Yaprak and Suna (my new Turkish grandmother) taught me so many beautiful recipes that I knew it was unfair of me to not share them. Mücver was just the beginning of the amazing food I was to eat in Turkey, and I can safely say Yaprak and Suna are by far the best cooks in the country! I feel very honoured that I now have some of the treasured family recipes under my belt ready for me to cook any time I please. Each time I do recreate  one of these recipes at home in Australia, I immediately get transported back to my summer in Turkey and it's amazing cuisine. 

This recipe is part one of an eight part recipe feature I will present over the upcoming weeks sharing with you these family recipes and stories from my time in Turkey. Whilst I have made a few minor adjustments to some recipes to make them even a little bit healthier, the recipes on their own are so beautiful and are very easy to create at home. This is a recipe I highly recommend everyone tries at home, as it really is just so simple and delicious.

Whilst in Turkey we did an amazing road trip around the country from Ankara to Cappadocia, then down around the coast all the way through to Istanbul. It was a holiday to remember with my lovely new Turkish family around us the whole way. I cannot thank Yaprak enough for showing me her country and for always making sure my belly was fed and we were well adventured and rested. We got to see some absolutely beautiful places and got to stay in some of the most mind blowing towns on earth (staying right on the Mediterranean with just steps to take you from your room to the water!?). All of these places and memories I will never ever forget about. 

Food is by far the biggest thing in Turkey and it is what brings families together and even strangers. There are no fonder memories than helping Yaprak and Suna in the kitchen and then sitting down for a big long family meal. The colours on the tables are always the most beautiful part, with so many different textures and dishes on each spread. Everything is always served with beautiful breads and crunchy fresh peppers and vegetables. Fresh pickled items and amazing cheeses. It is a place you cannot go and not fall in love with the cuisine, as so much love has gone into each and every dish it just flows through your body.

I hope everyone enjoys this recipe feature as much as I do, and you can all get a glimpse into the beautiful people and food of Turkey.


Serves 5
Prep time: 10 minutes
Cooking time: 15 minutes
 

Ingredients

2 zuchinnis - grated
1 brown onion - grated
3 eggs (for vegan substitute with 3 flax eggs or 'no egg')
1 tsp bicarb soda
1 tsp lemon juice
1 tsp salt
1/2 tsp cracked black pepper
1/2 tsp red pepper
1/2 bunch dill
1/4 bunch mint
1 cup white spelt flour or buckwheat flour
1 tbsp macadamia oil (or another high smoke point oil)

Method

Place all ingredients into a bowl and stir, adding in more flour 1tbsp at a time if needed.

Heat a non grease fry pan, and place in the macadamia oil. Place over a low-medium heat and place in 1 dessert spoon of mixture at a time to create small pancakes. Flip after 2 minutes or once golden. Remove and set aside. Keep cooking the mucver until all mixture has been used.

Eat immediately or store in an air tight container for up to 5 days in the fridge.

Serve with yoghurt or labneh, peppers and marinated spicy olives.

Kate BradleyComment
Mexican Scrambled Tofu
Photography by Elisa Watson.

Photography by Elisa Watson.

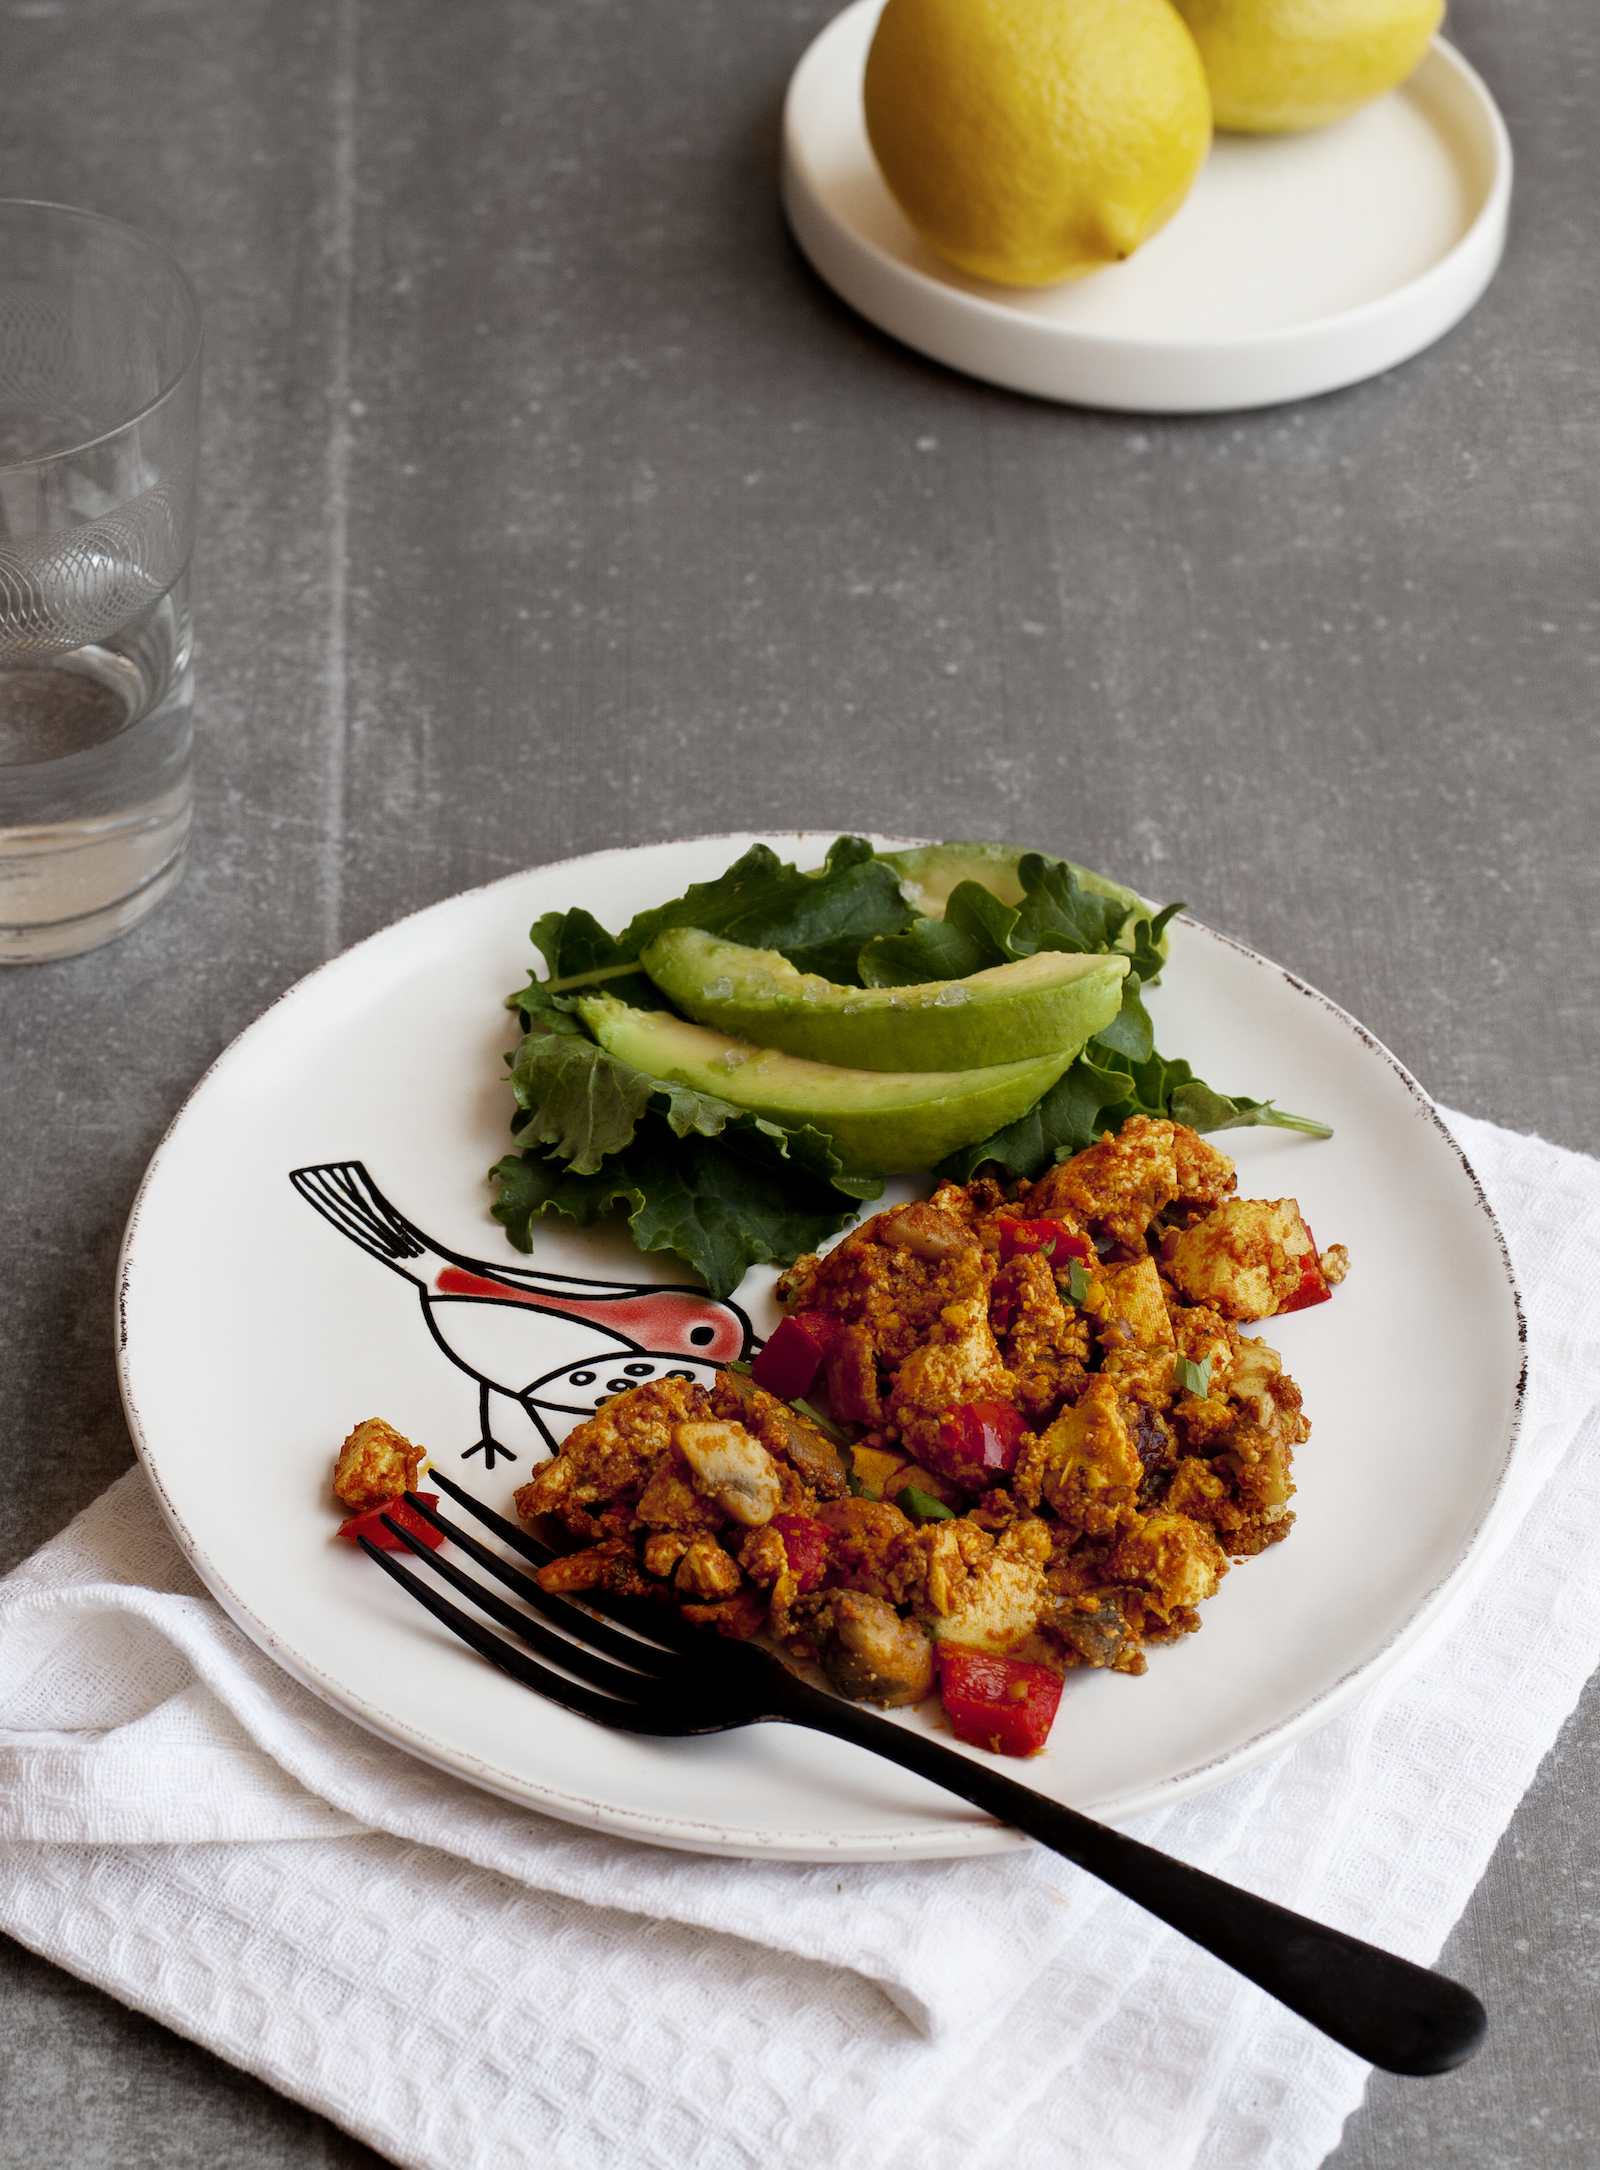
This recipe is a simple concept that has your taste buds diving into a new world of flavour. It is a high protein recipe and will pack a punch in your mornings. Scrambled tofu as a replacement for eggs is no new concept, however having scrambled tofu on it's own is never a very visually appealing or flavoursome dish. By adding the Mexican flare to scrambled egg replacement it's flavour profile exceeds it's looks and it becomes a truly magnificent morning meal. I have created this dish countless times for guests and every single one has adored it. If you have recently given up eggs or are looking for alternatives, this is a great substitute to allow you to still have your scrambled breakfast but in a whole new amazing way.

Please do not forget there are limited tickets are available for my Plant Based Mexican Cooking Classes. With only 10-12 seats available in each class they are filling up quick so make sure you head to the events page to book your tickets so you don't miss out! The 2.5 hour workshops will see you with a new cuisine under your belt as well as walking out full, fed and with a goodie bag of items to take home. For more information and to book your tickets head to the  Events page now.


Serves 4
Prep time: 10 minutes
Cooking time: 15 minutes

Ingredients
2 tablespoons macadamia or coconut oil
300g organic firm tofu
1 teaspoon cumin
1 small capsicum, diced
2 cups chopped button mushrooms
2 tablespoons cashew butter
1/2 tsp turmeric powder
1 tinned or dried chipotle chilli (if dried, first soak in water for 20 minutes)
1 splash organic hot sauce (such as Hunted & Gathered)
1⁄2 teaspoon salt
1⁄2 teaspoon freshly ground black pepper
2 tablespoons tomato paste (concentrated tomato purée)
1⁄2 cup baby English spinach or chopped kale

To serve
1⁄2 avocado
4 leaves kale
1⁄4 bunch coriander (cilantro) leaves

Method
Put the rice bran oil and crumble the tofu into a medium frying pan over medium heat. Sprinkle over the cumin and mix into the tofu. Add the capsicum, mushrooms, turmeric butter, chipotle chilli, hot sauce, salt, pepper and tomato paste. 

Cook for 5–10 minutes until the vegetables are softened and everything is well heated through. Add the spinach, stir through and remove from the heat.

Serve with the avocado, fresh kale and coriander. 

Custard Apple Ice Cream + Jamaican Fruit Salad
Photography by Elisa Watson.

Photography by Elisa Watson.

It's that time of year in Australia where it is starting to heat up and the amount of tropical fruits available increases every week. Although tropical fruits are not so commonly grown where I live (in Melbourne), the farmers in Northern NSW, QLD and Carnarvon region in WA are beginning to grow many rare and exotic fruits as well as the common tropical favourites. To celebrate this season rapidly approaching in Australia, I have created a recipe with some of my favourite tropical fruits and a deliciously creamy and vegan custard apple ice cream that will take you into another world. 

Custard Apples are significantly high in Vitamin C, Thiamine, Potassium, Magnesium and dietary fibre. They are rich in antioxidants and have been proven to help cardio-vascular disease, lower cholesterol, increase haemoglobin levels and have anti-diabetic properties and anti-obese properties. As well as this, Custard Apples stand to be complete super heroes when it comes to their anti-cancer properties. Custard Apples contain acetogenins which have been tested in the treatment of 60 different types of cancer cells and have shown they can be up to 200-300 times stronger than some leading cancer drugs (such as Taxol). So basically apart from being super insanely delicious, custard apples have a very wide range of bioactivity and are worth researching and consuming!! They are not only my favourite fruit because of their custard like taste, but also because of their insane health benefits.

Alongside the Custard Apple ice cream, each fruit in the tropical Jamaican fruit salad is incredibly vitamin and mineral rich and it's definitely a dish that will really love your body back. If you see Custard Apples at the supermarkets or markets, I suggest picking up a few and trying them. In fact, if you see any tropical or exciting new fruit, why not give it a go - as they aren't always in season for long, and it's good to support the growers who are trying to introduce new beautiful fruits into our different countries.

Do not forget that the Kenkō Kitchen cooking classes are coming up next month. These may be the only classes for the year and are filling up fast! To find more information on tickets and to book please head to the store. The classes are small, intimate and are shaping up to be incredibly fun and informational! I cannot wait to see your faces there and most importantly cannot wait to cook with you all!!!

For information on the cooking classes and to book tickets, click here!


Serves 4
Cooking time: 20 minutes
Prep time: 20 minutes

Refined Sugar Free, Vegan, Dairy Free, Egg Free, Nut Free, Gluten Free

Ingredients

For the ice cream
2-3 large custard apples (flesh only, seeds removed)
1 cup coconut cream

1/2 cup coconut milk
1/4 tsp salt
1/2 cup coconut sugar

For the fruit salad
1 mango (diced)
1/4 papaya (diced)
1/2 pomegranate (seeds only)
1/4 pineapple (diced)
2 star fruit (sliced)
2 passion fruits (seeds only)
juice 1 lime
1 tbsp coconut sugar

Method

To begin, start by placing all ingredients for the ice cream into a blender. Blitz on high until smooth and transfer into an ice cream maker for 15 minutes or until thickened. Alternatively simply place into the freezer and stir every hour or so until frozen. Keep in freezer until needed. Take out ice cream 10 minutes before serving to allow for an easy scoop.

To make the fruit salad simply slice all fruits up, and stir through the lime juice and sugar. Keep in the fridge if making in advance.

To serve, divide the fruit salad into four bowls with a scoop or two of the ice cream and enjoy!

Kate Bradley Comment
Introducing the Kenkō Kitchen Cooking Club
Kenkō Kitchen Cooking Club Classes beginning in October 2014.

Kenkō Kitchen Cooking Club Classes beginning in October 2014.

cookingclubbadge

As some of you may have already seen and heard, this coming October I will be launching my new baby, the Kenkō Kitchen Cooking Club. For this I will be holding four demonstration cooking classes in Melbourne, Australia. This is a project which I am really excited to begin and bring forward to the health community. My passion for whole foods goes far beyond any fad diet or label and this passion is something I really want to share with you all. Cooking healthy foods doesn't have to be a chore, nor should it be hard or lacking in flavour. I'm not talking about teaching you how to make boring salads with lettuce and 'rabbit food', I'm talking about going back to our roots and using these basic ingredients - plants - in such a way which creates something so powerful on our plates. I want to show you how easy it can be to create colour and life on your plate to allow yourself to completely transform your bodies and minds through nourishment. 

In these demonstration classes held in South Melbourne you will learn how to cook four to five different plant based, whole food dishes as well as some basic kitchen skills. It is a great introduction into healthy whole food eating and the demonstrations are designed to show you how easy it can be to create amazing dishes and give you that confidence to cook plant based meals at home with ease.

Each attendee will be provided with a delicious organic cold pressed juice to enjoy throughout the class and a yummy fresh nut mylk. At the end of each class there will also be time set to sit down and enjoy the food that has been created in the class with the rest of the attendees and myself. This will be a great chance to socialise with others in the community and to also ask any questions you may have about cooking or the whole foods diet.

All dishes taught in the classes will be vegan, gluten free and refined sugar free as to really try and accommodate everyone, no matter their allergies and intolerances.

There will be two classes dedicated solely to the purpose of Plant Based Cooking, introducing attendees into the world of delicious and wholesome dishes. Alongside this there will also be two classes which will have you ditching the supermarket taco kit as they are dedicated to Plant Based Mexican cooking, a cuisine which is already so fun, flavoursome and fresh and when it has that Kenkō twist, it really does blow everyone away!

I hope I will get to see some of your faces at the classes, and I thank everyone who has booked their tickets so far. This is something which is incredibly close to my heart and I look forward to being able to share my love of whole food cooking with all of you in a new way.

For more information including dates and times of the classes please click here.

October 2014 Kenkō Cooking Class Dates:

Introduction to Whole Foods
October 12th 9:30AM - 12PM
October 26th 9:30AM - 12PM

Introduction to Plant Based Mexican
October 12th 1PM - 3:30PM
October 26th 1PM - 3:30PM

Kate Bradley Comment